Table of Contents
- Logging In
- Admin Dashboard Overview
- Editing Basic Website Information
- Adding and Managing Media
- Adding and Managing Pages
- Adding and Managing Staff Pages
- Adding New Staff to the Our Team Page
- Adding and Managing Blog Posts
- Adding new users
Logging In#
To log in to the admin dashboard, navigate to https://wibehavioralhealth.com/admin. Enter your username and password and click "Log In".
Admin Dashboard Overview#
Posts#
Posts are all your website's blog posts.
Media#
Media is where you upload all assets such as images, videos and PDFs.
Important!
There will rarely be a time when you should upload a full resolution image to your website. Outside of video, images are the most resource-intensive form of media that your website will load. Loading full-size images will drastically affect the performance of your website and hurt your SEO as a result.
To optimize an image: make sure to only use .jpg image files. .png files save a lot more image data and can easily make an identical image four times the file size of a jpg. If you're using an image editor like photoshop you will have image options when you save. Save as the lowest quality you can before your image starts to look bad. When done right, it’s rare that the loss of image quality will be noticeable to an untrained eye. For the majority of images, you should shoot for around 100kb file size for images you upload to the website.
Pages#
This is where you will find your website's primary pages.
Plugins#
Plugins are pieces of third-party software that extend and add to the functionality that already exists in WordPress. Be very careful here and avoid this section completely if you don't know what you're doing.
Users#
Add new users if you need to give access to additional employees who are going to edit posts on your website.
Settings#
This is where you will find a variety of settings ranging from general website settings to writing, reading and permalinks. All settings are already configured to meet your needs. Changing these can be very dangerous and can do harm to your website; only change settings here if you know what you're doing.
SEO#
Basic on-page elements like page titles and meta descriptions are powered by Yoast SEO. SEO settings are configured so you shouldn't ever need to change anything in here. Be careful and only change settings here if you know what you're doing.
Editing Basic Website Information#
Adding and Managing Media#
- Navigate to Media. Here you will see all assets in your media library.
- Next, click "Add New" and then either drag and drop files from your desktop, or click "Select Files" to upload an image.
- Lastly, add alternative text to your image. Alt text can provide a small amount of SEO value as search engines use alt text to gather information about your images. Most importantly, image alt text is used by screen readers. Screen readers use alt text to read a description of your image when someone with a visual impairment cannot see the actual image. Write alt text exactly like you're describing the image to someone who cannot see it.
Adding and Managing Pages#
- Navigate to "Pages" in your admin dashboard. Here you will see a list of all your website's pages. Select the page you need to edit by either clicking the page title or by hovering and clicking "Edit" in the options that appear. To quickly find pages, use the search option in the top right corner of the page.
- Your website uses the Divi page builder which is a no-code page builder. Divi offers both a Divi Builder and a Visual Builder.
Editing a Text Module#
Divi uses blocks often referred to as modules.
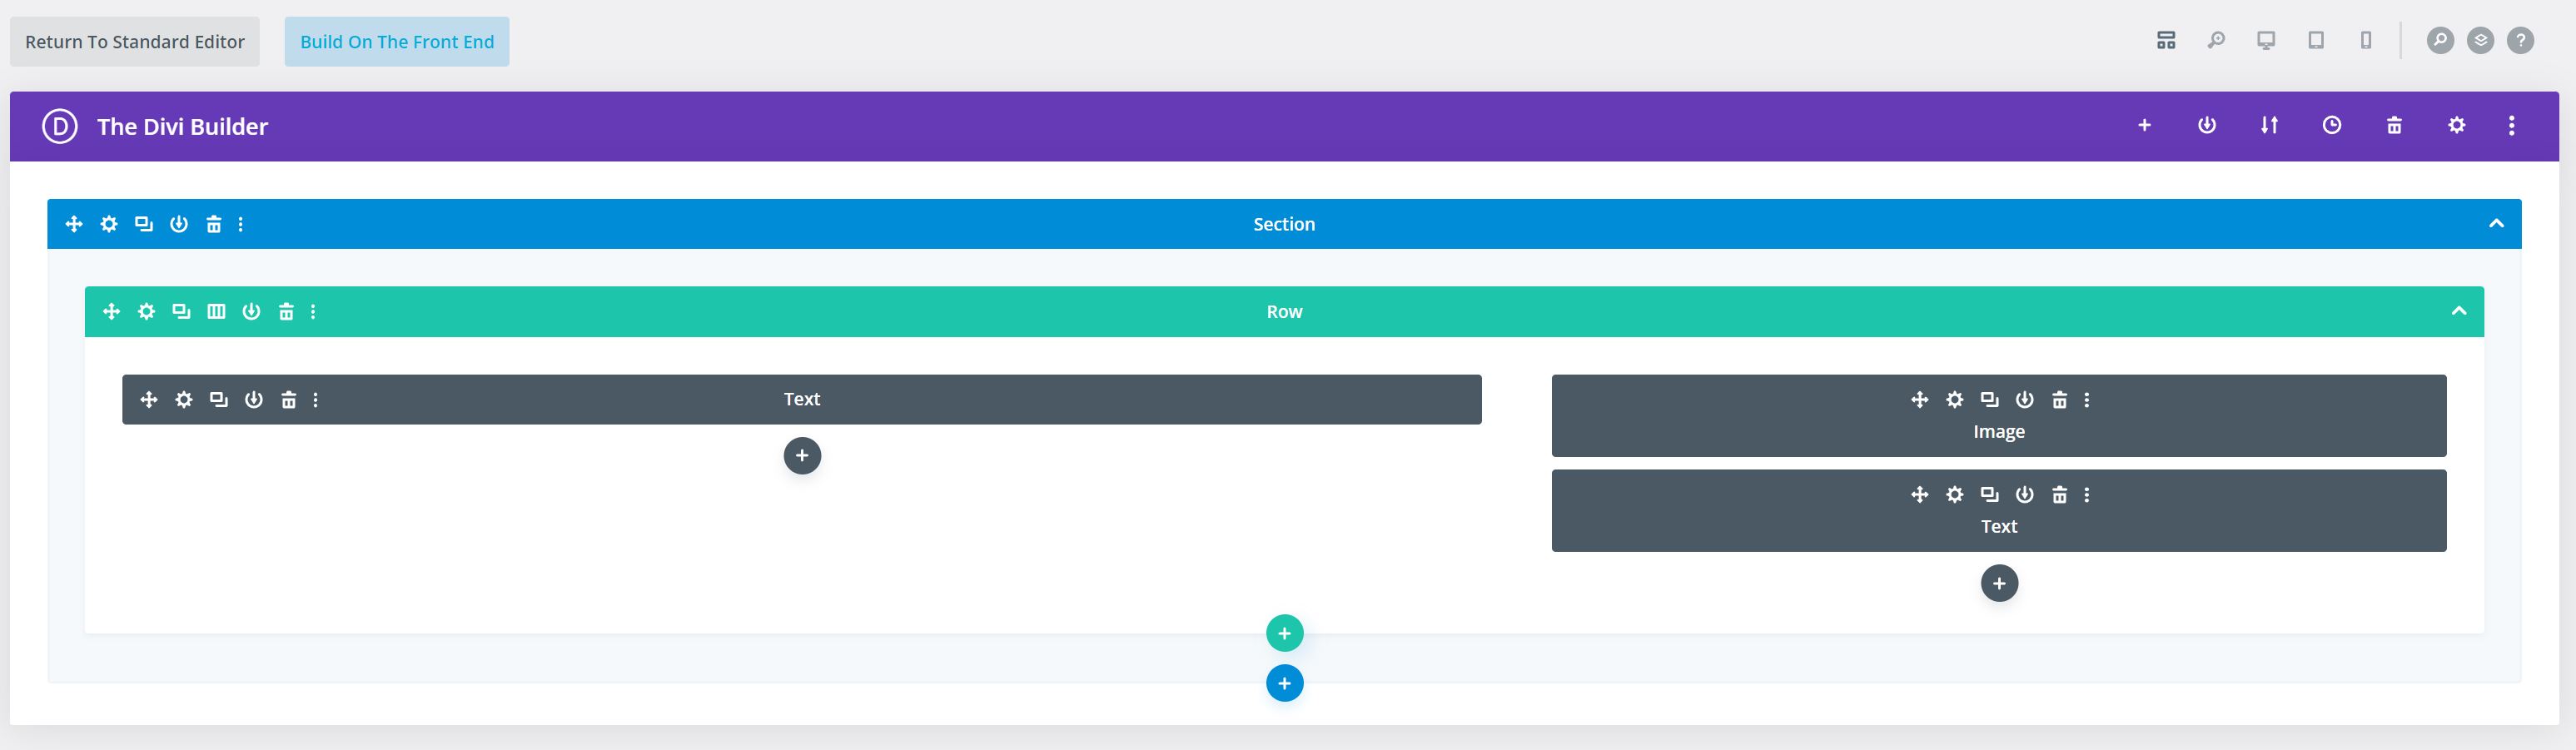
- Navigate to the text module you need to edit and click the gear icon to edit.
- Edit the content as needed and click the green checkmark at the bottom right corner of the module.

- To publish your change to the front-end of your website, click the "Update" button at the top right of the page editor options.
Editing an Image Module#
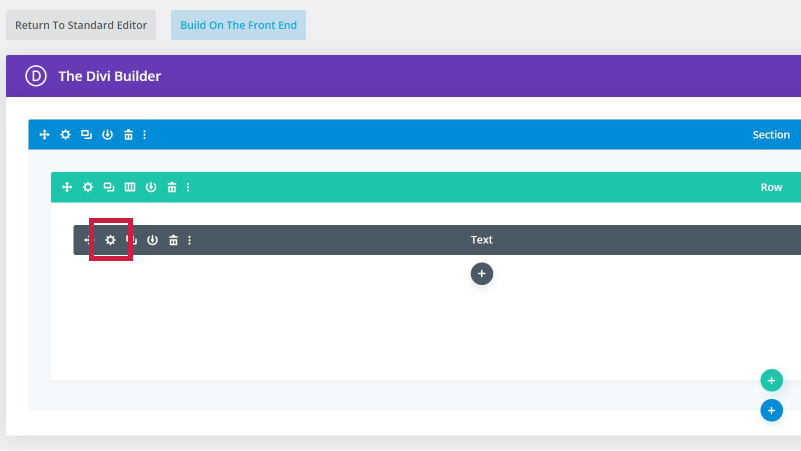
- Navigate to the image module you need to edit and click the gear icon to edit. If an image is already in place, simply click the image preview to open up the media library.
- Select your new image from the image library, or switch to the "Upload files" tab to add a new image.
- To upload a new image, click "Select Files" or simply drag and drop an image from your desktop.
- When ready to add your new image, select the "Upload an image" button in the bottom right corner.
- To finalize your change within the module, click the green checkmark at the bottom right corner of the module.
- To publish your change to the front-end of your website, click the "Update" button at the top right of the page editor options.
Yoast SEO#
Each page has unique SEO settings and metadata that can be configured using the Yoast SEO plugin. Yoast settings are found at the bottom of the page underneath the editor. Here you can configure an SEO title, Meta description and more.
Adding and Managing Staff Pages#
- Managing staff on your website requires a two-step process. You will need to create a new page for the new staff member and also edit the main Our Team page to ensure that the new staff page is listed there as well.
- Navigate to "Pages" in your admin dashboard and find the existing staff page you need to edit. To quickly find pages, use the search option in the top right corner of the page. Click on the post title or click "Edit" to open.
- The easiest way to create new staff pages will be to hover over an existing staff page and click "Clone". This will ensure that layouts and all elements are already established and kept consistent across pages.
- Add your staff name as the page title, click "Edit" on the permalink field and simply erase all existing data to create a new permalink for the page.
- Next, navigate to the text module and edit all details like name, title, and bio.
- Navigate to the Image module to upload your staff headshot.
- Back in the editor sidebar, scroll down to the "Featured image" section and set your staff headshot to your featured image. This will ensure your headshot is used as the preview image if the page is shared on any social media channels.
- Lastly, click the "Publish" button in the top right corner of the editor sidebar to publish your new page.
Adding New Staff to the Our Team Page#
- Navigate to the Our Team page and click edit.
- The Our Team page uses a Divi blurb module to hold both image and text data in one combined module. Clone an existing module to use as a template by clicking the "Duplicate Module" icon.

- Enter in your name as the module title, edit your body content as needed.
- Next, click open the "Image & Icon" section. Click on the image preview to upload a new image.
- Next, click open the "Link" section and enter the URL to the staff bio page.
- To finalize your change within the module, click the green checkmark at the bottom right corner of the module.
- To publish your change to the front-end of your website, click the "Update" button at the top right of the page editor options.
Adding and Managing Blog Posts#
- Navigate to "Posts" in the admin dashboard. If editing an existing post, find the post in the list, or search for the post by name in the search bar at the top right of the page. Click on the post title to edit.
- To add a new post, click "Add New".
- Enter your post title.
- Type out your post details in the post editor.
- Scroll down to the Yoast SEO section and enter in a SEO title and Meta description.
- Set a featured image.
- To publish your change to the front-end of your website, click the "Update" or "Publish" button at the top right of the page editor options.
Adding new users#
- Type in the username for your new account.
- Enter the email address of the new user.
- Enter in a first and last name to make it clear who you are creating the account for.
- Select the type of role that you want to give the new user. Read more about WordPress Roles.