Table of Contents
- What is Jamstack?
- Logging In
- Admin Dashboard Overview
- Editing Basic Website Information
- Managing Pages
- Adding New Event Posts
- Editing Existing Event Posts
- Editing Basic SEO Information
- Inbox
- Special Considerations
What is Jamstack?#
Welcome to your new Jamstack website! Jamstack creates a simple website architecture that makes your website faster, more secure and scalable. Jamstack’s core principles of pre-rendering and decoupling enable your website to be delivered with greater confidence and resilience than ever before.
Here are the main benefits of Jamstack:
Faster performance#
Serve pre-built markup and assets over a Content Delivery Network.
More secure#
No need to worry about server or database vulnerabilities.
Scalability#
If your website suddenly goes viral and has many active users, the CDN seamlessly compensates.
Logging In#
Your website content is managed with the content management system CloudCannon. To log in to your admin dashboard, navigate to
https://www.stadiumbike.com/ic-sec=stadium-bike-admin
Enter your password and click "Sign In".
Admin Dashboard Overview#
Home#
Home is where you can find your Live URL, a preview of your website and a list of recent activity.
Inbox#
Inbox is where you can view and manage the email notifications from your contact forms.
Pages#
Here you will find a list of all your website pages.
Data#
Data acts as a database of global information used throughout your website. Data is split between Global Partials and Site Settings. Global Partials are common blocks used throughout the website such as global Call to Action blocks. Site Settings are general settings like your business name, address, phone number and so on.
Editing Basic Website Information#
Managing Business Info#
- Navigate to Data > Site Settings.
- Here you can edit your business name, address, phone, fax, email and social media links.
- As soon as you make a change, you will see the save button in the top right corner activate. Click "Save" to publish your changes to the website, or continue to other pages that you need to edit. Your changes will be bulk saved and you can publish all changes together.
Managing Locations#
- Navigate to Data > Locations. Here you will find a list of all data associated with each location.
- Ex. To edit an item like your social media, scroll to the Social Media section.
- Your website is preconfigured with options for Facebook, Instagram, Twitter, LinkedIn, YouTube and TikTok.
- Click on the social media platform you want to add a link to and simply paste your page's URL in the link field.
- Click "Save", to publish your change. As soon as you add a link to any of these, the appropriate icon will be displayed in the footer of your website.
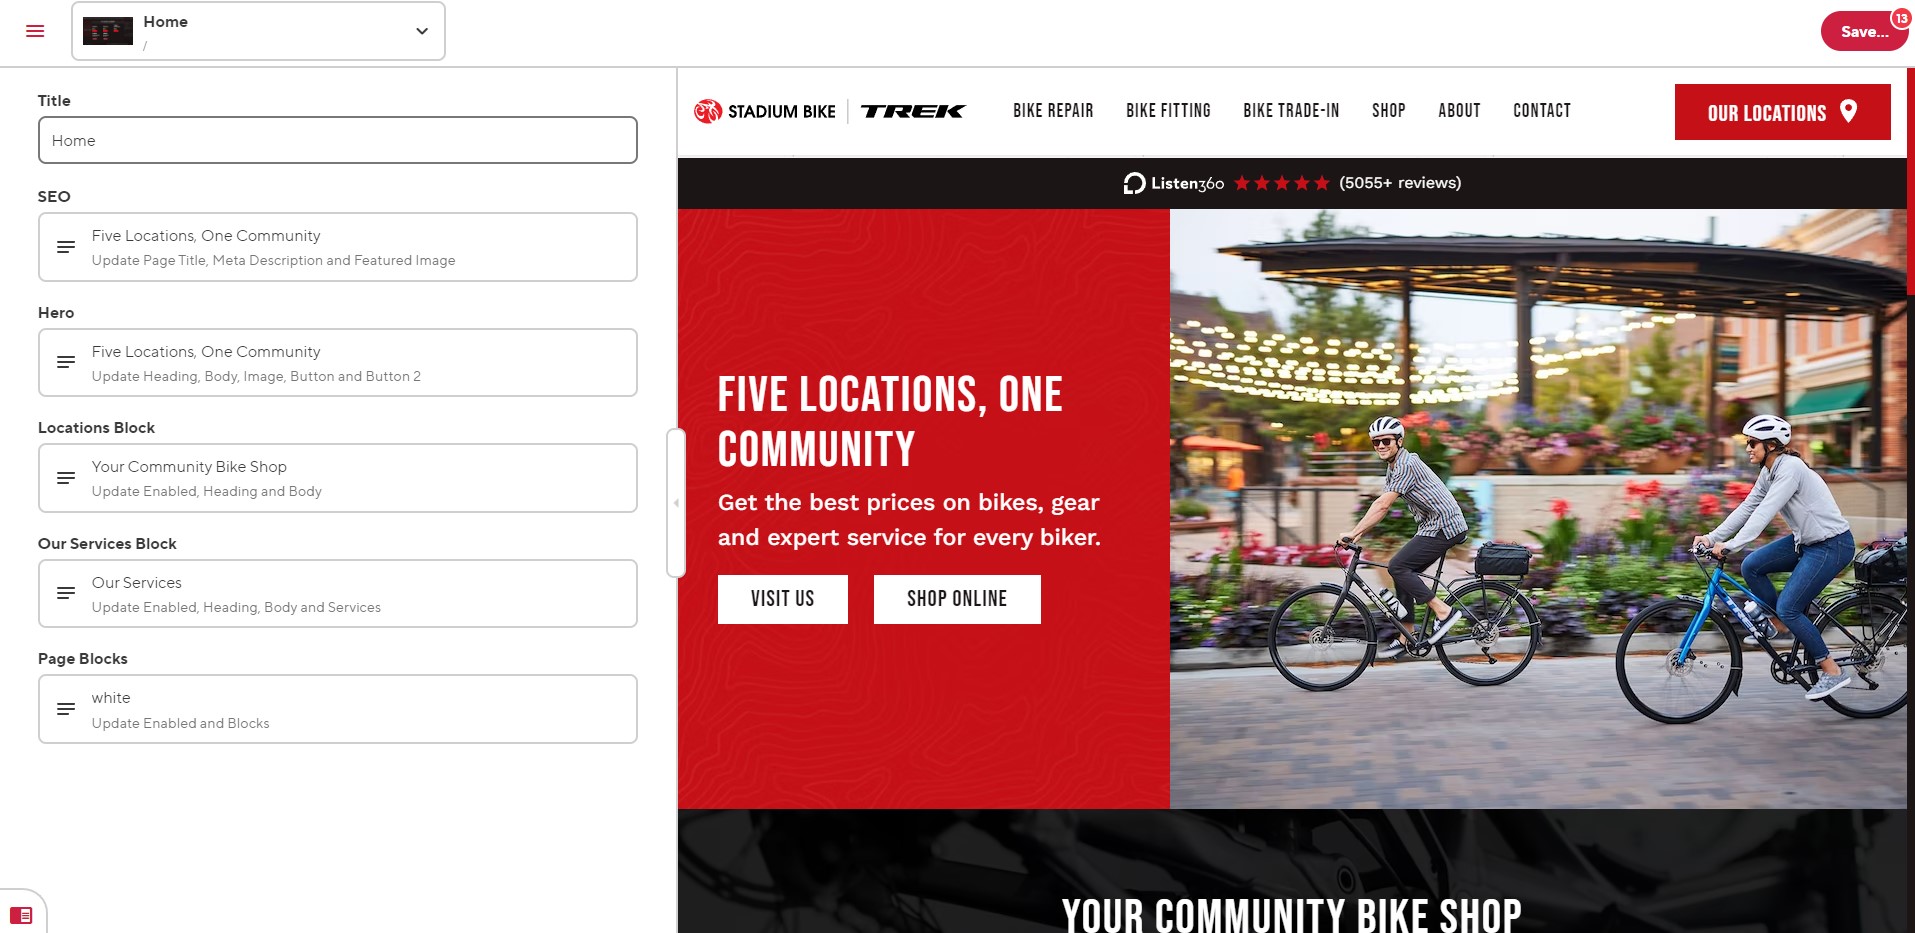
Managing Pages#
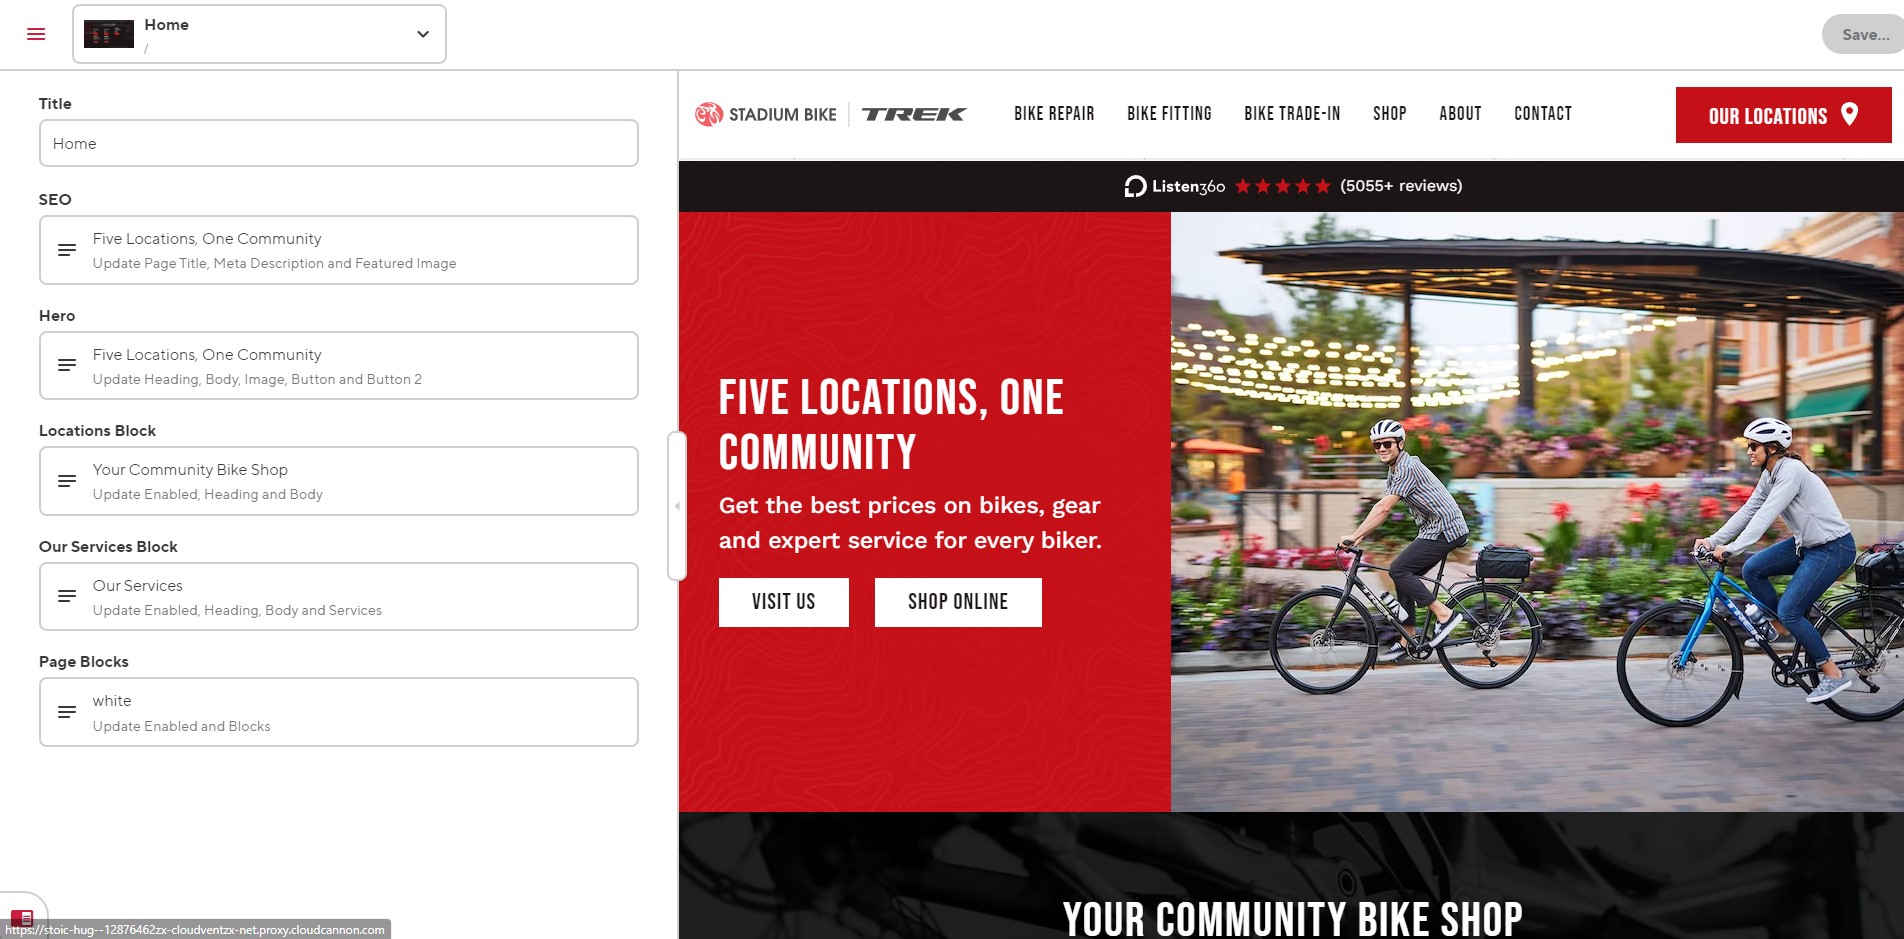
- Navigate to Pages. Here you will see a list of all your website's pages. Select the page you are looking for by clicking on the preview image of the page. You can also open the editor by clicking the three vertical dots in the top right corner and then selecting your options.
- Note: To open the visual editor, if not already open by default, click the three vertical dots and choose, "Open With >" and then select "Visual Editor.” If already in the editor, open the dropdown menu in the top left corner and select visual editor.
- Once the editor is open you will see a similar content structure for all pages. All primary pages will contain a Title, SEO, Menu, Hero, and Intro, followed by all content blocks the page uses. Each content block gives a brief overview of what is contained within it.
- To edit a content block, click on the content block field, this will open all the fields contained within the block. Once you are done making your changes, click "Save" in the top right corner, or continue to other pages that you need to edit. Your changes will be bulk saved and you can publish all changes together.
Adding New Event Posts#
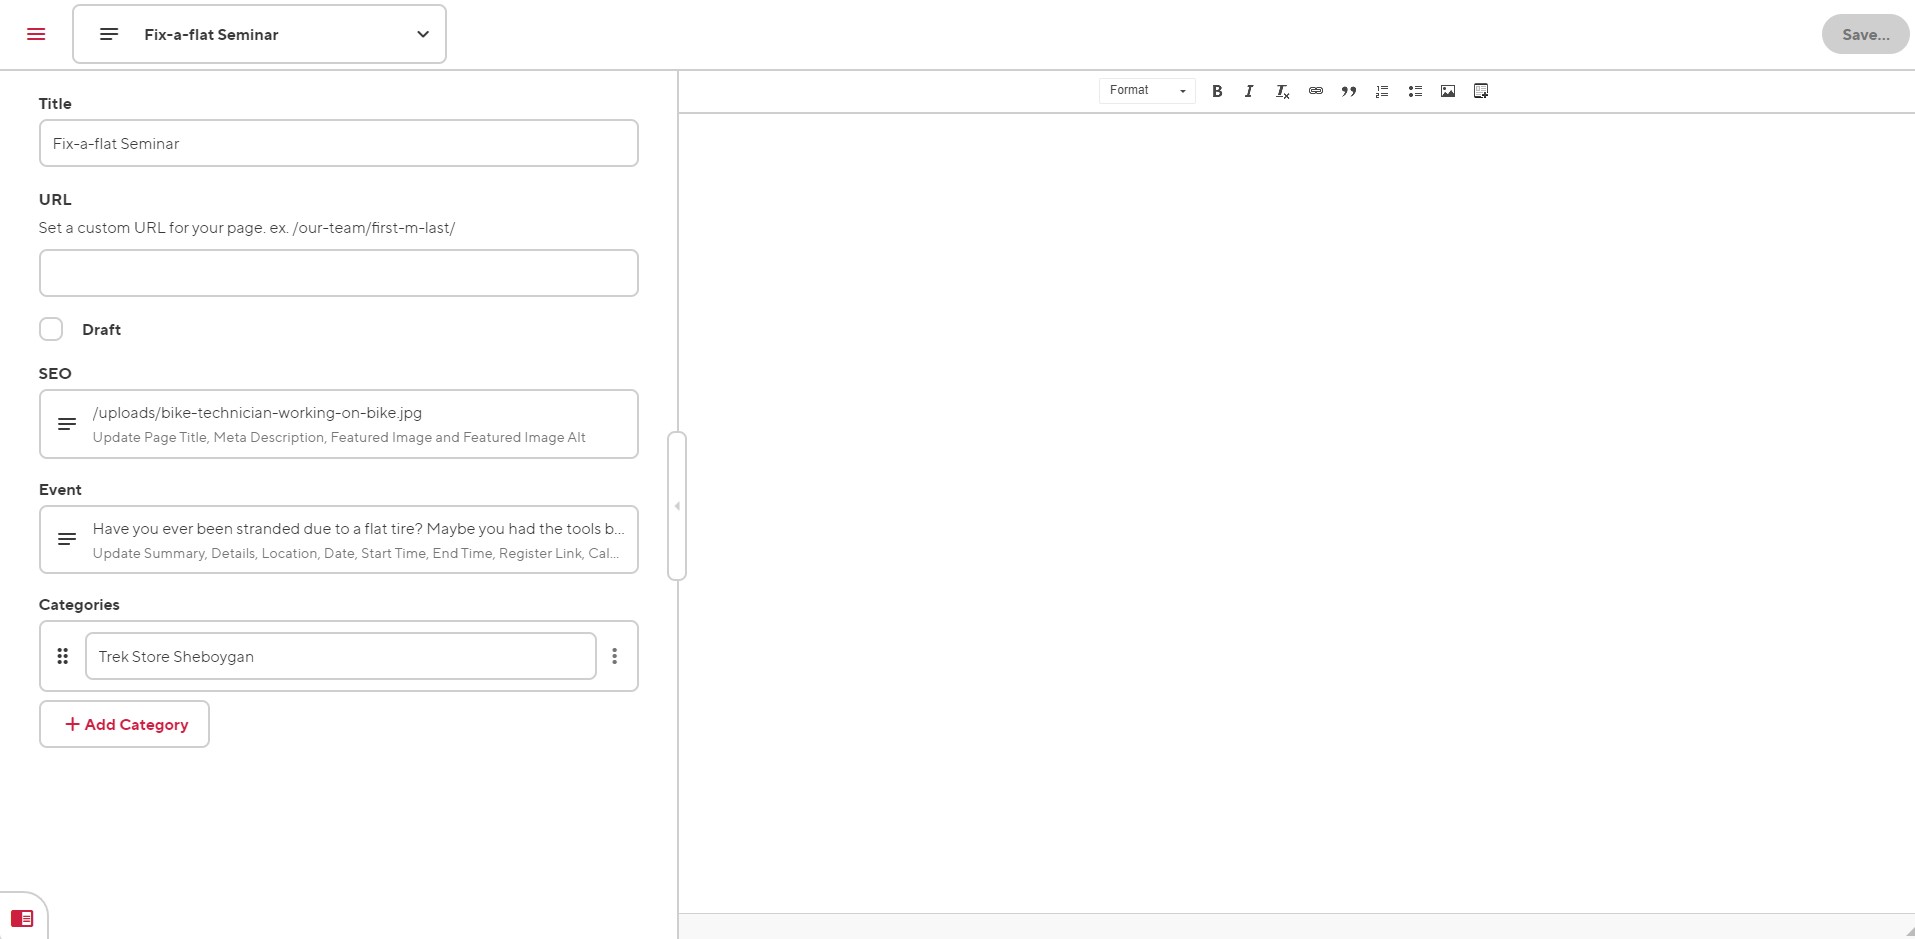
- To add a new post, select the + Add button at the top right corner of the screen. Then click, + Add Event
- Once the editor is open you will see a similar content structure as all your pages. The post editor will be split between two main sections, the data editor and the content editor.
- Within the data editor, enter your post title, URL if a custom URL is preferred, SEO data like page title, meta description.
- Note: Your SEO featured image, is used two ways for blog posts. The featured image is used in metadata for social media and search engines, but also as the featured image of the blog post itself. This get's displayed at the top of every post.
- Add event details by opening the Event data. Enter in all your event details.
- To add custom add to calendar links to the post, you can optionally use this tool https://www.labnol.org/calendar/ to generate your links. Every service handles these links differently so this is the most straightforward way of doing this.
- When ready to publish, ensure that your post is switched out of a draft state and click Save.
Editing Existing Event Posts#
- Navigate to Events. Here you will see a list of all your website's event posts. Select the post you are looking for by clicking on the preview image of the post. You can also open the editor by clicking the three vertical dots in the top right corner and then selecting your options.
- Once the editor is open you will see a similar content structure as all your pages. The post editor will be split between two main sections, the data editor and the content editor.
- To edit your post content within the content editor, use the formatting options of the WYSIWYG editor to style your post as you need.
- When ready to publish, click Save, or continue to other pages that you need to edit. Your changes will be bulk saved and you can publish all changes together.
Editing Basic SEO Information#
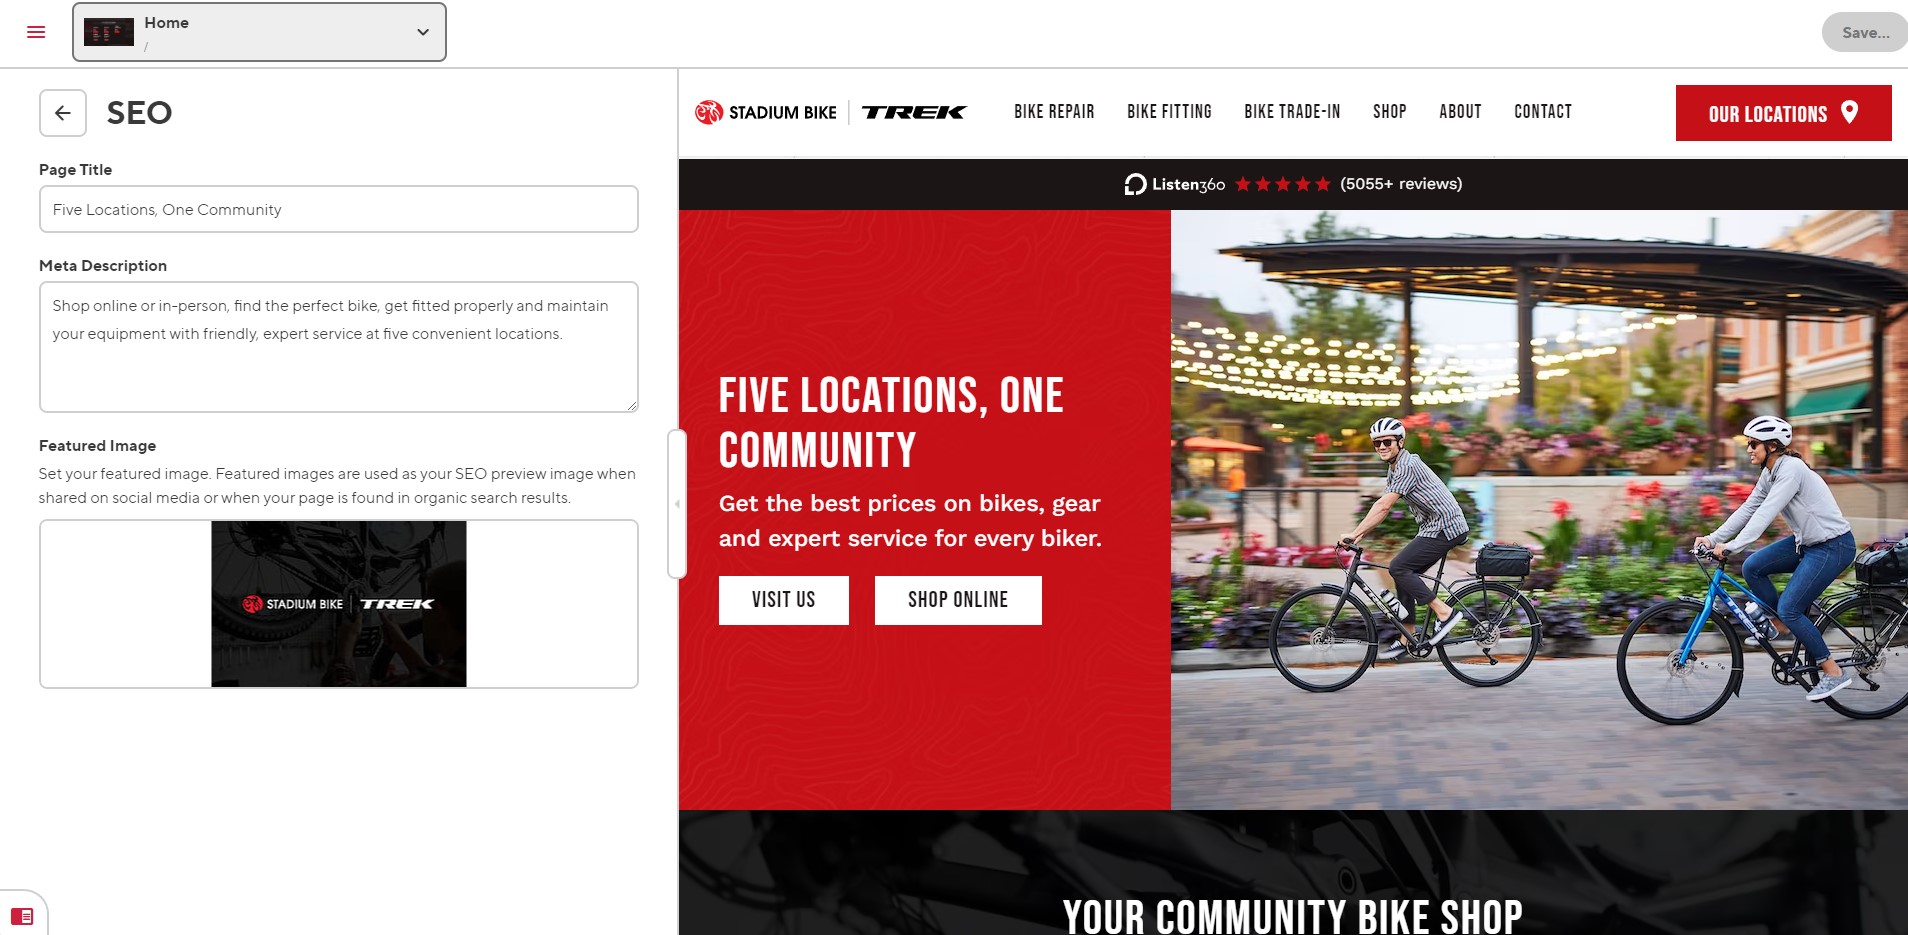
If you ever feel the need to edit SEO metadata for your website, SEO settings can be found on each individual page. Navigate to the page you want to edit and click open the "SEO" content block. Here you will find Page Title, Meta Description, and Featured Image for your page.
Inbox#
Inbox is where you can view and manage the email notifications from your contact forms. When you enter your inbox, you will see a list of all mail notifications that you have received. Click on any notification to view the full email details. You can also click the three vertical dots in the right corner to find options to resend the message, mark it as spam, or delete the message.
Special Considerations#
Image Selection#
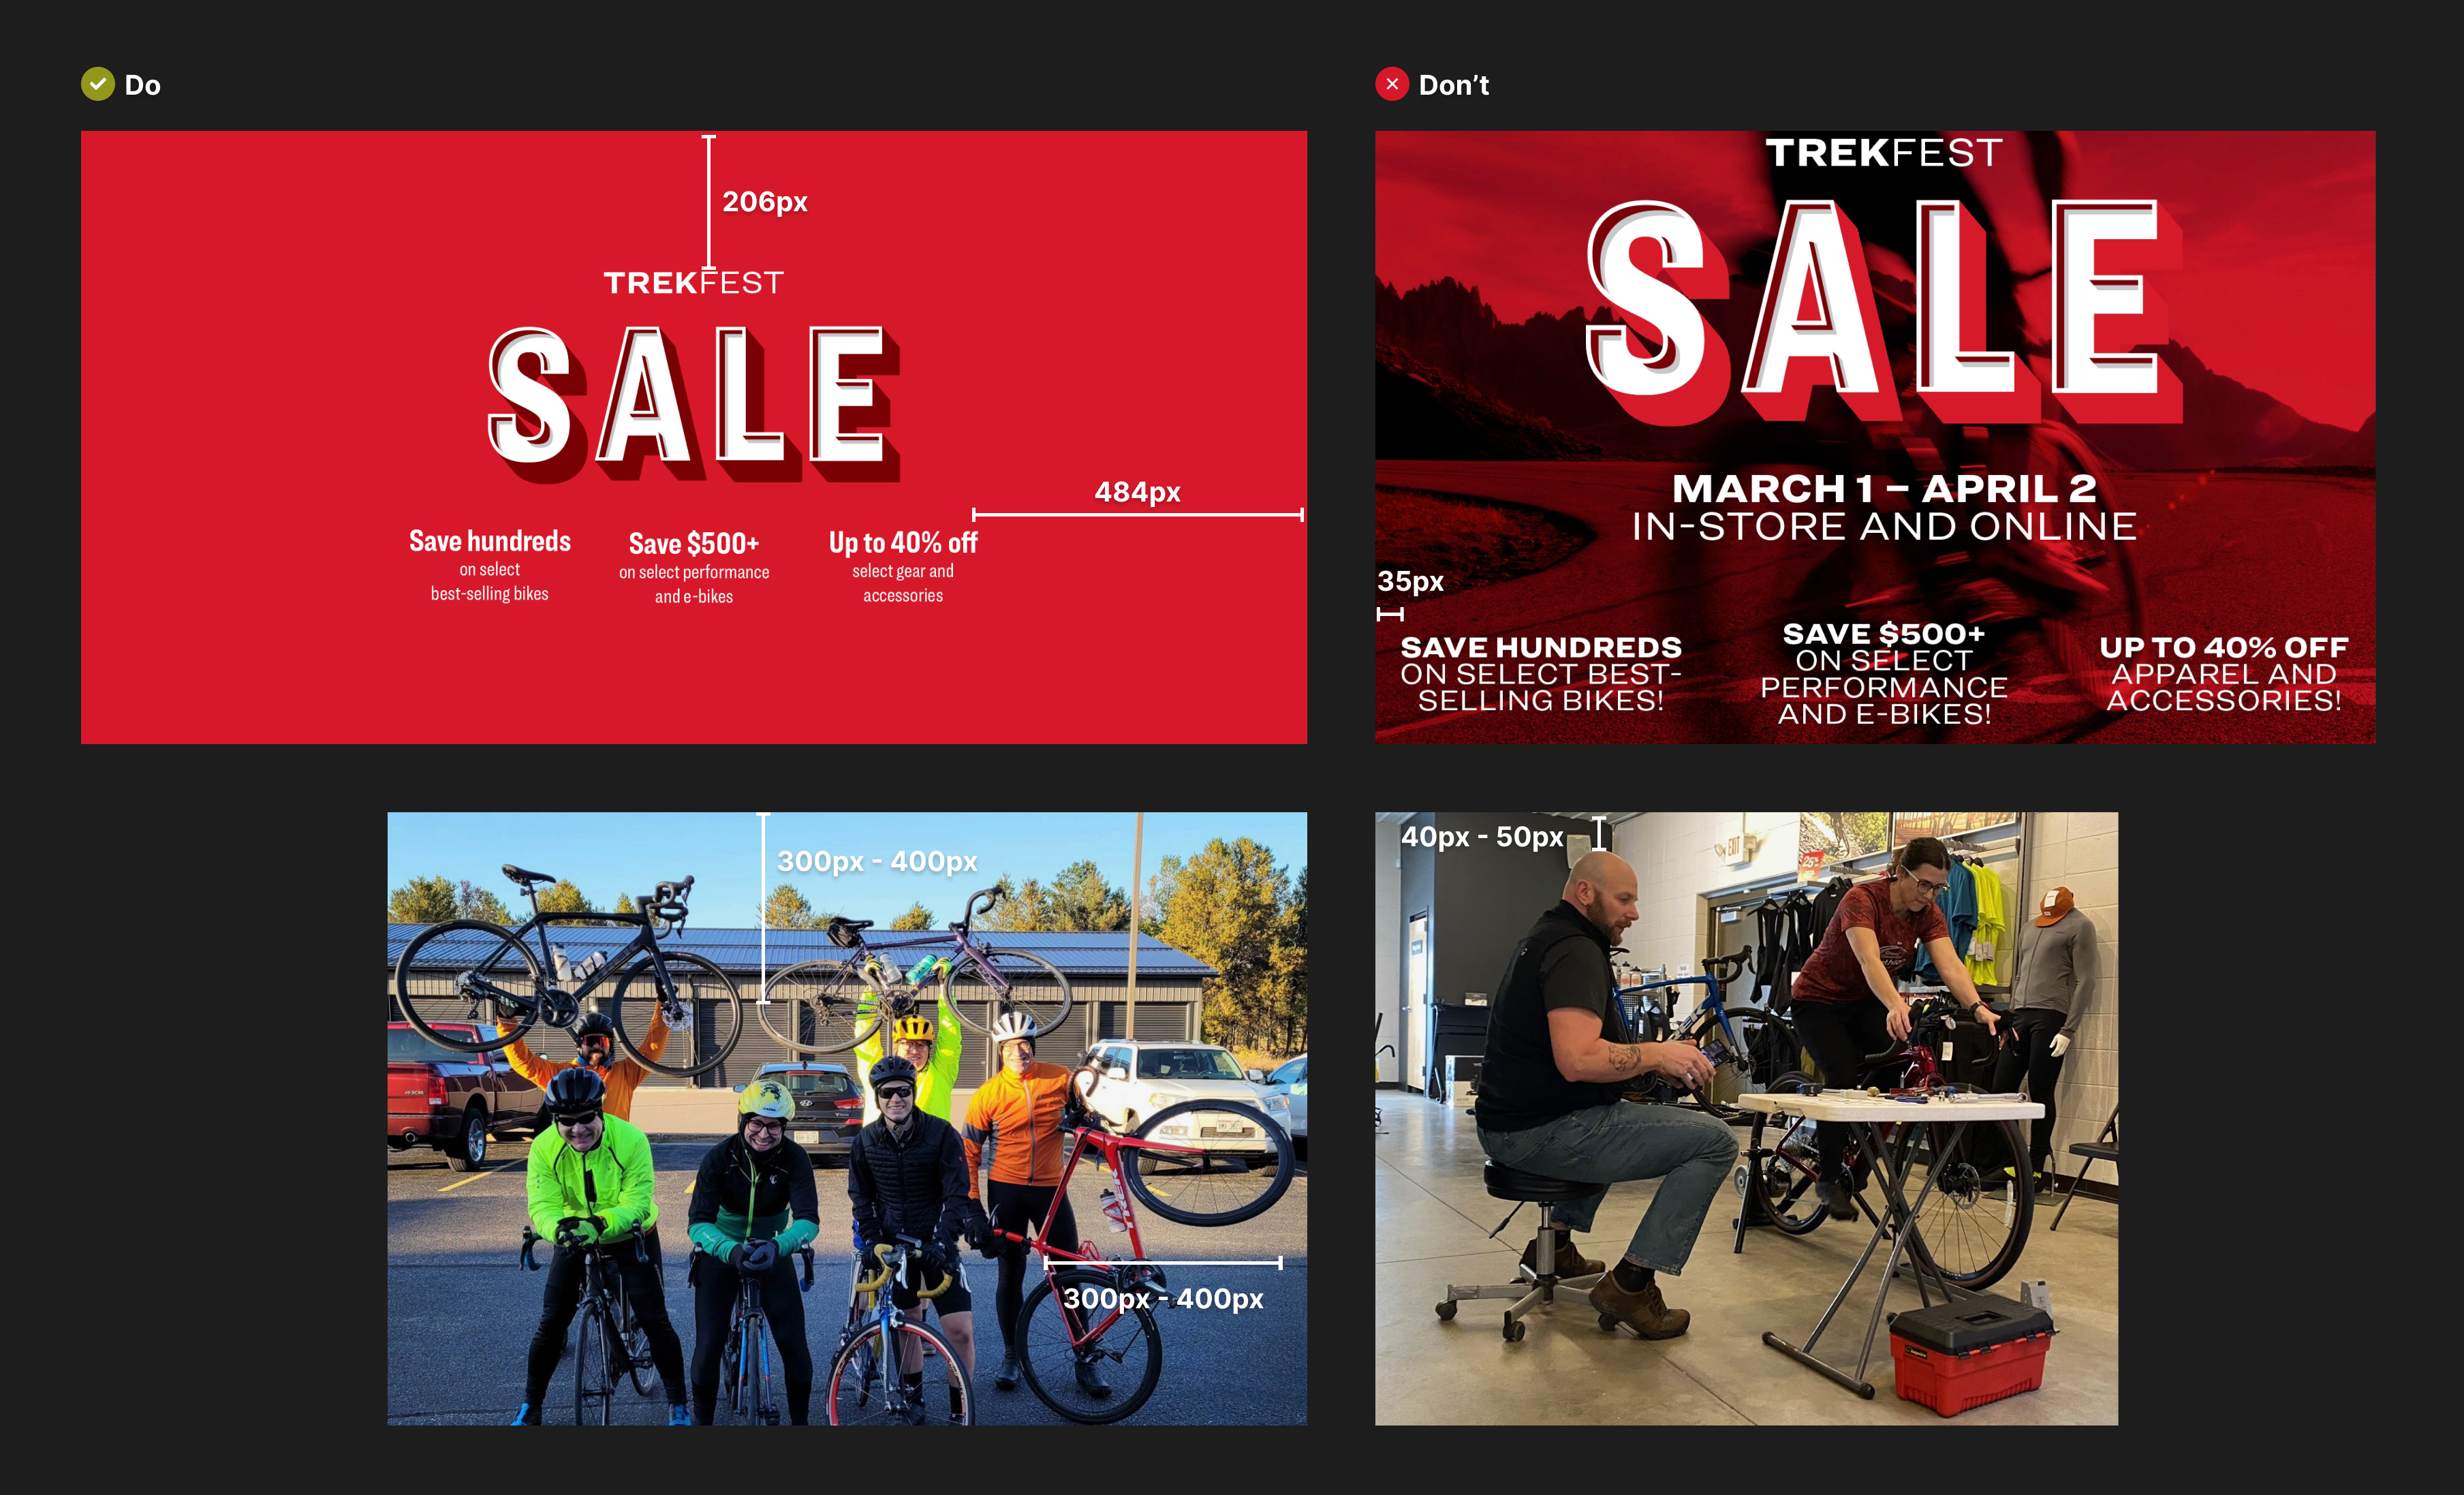
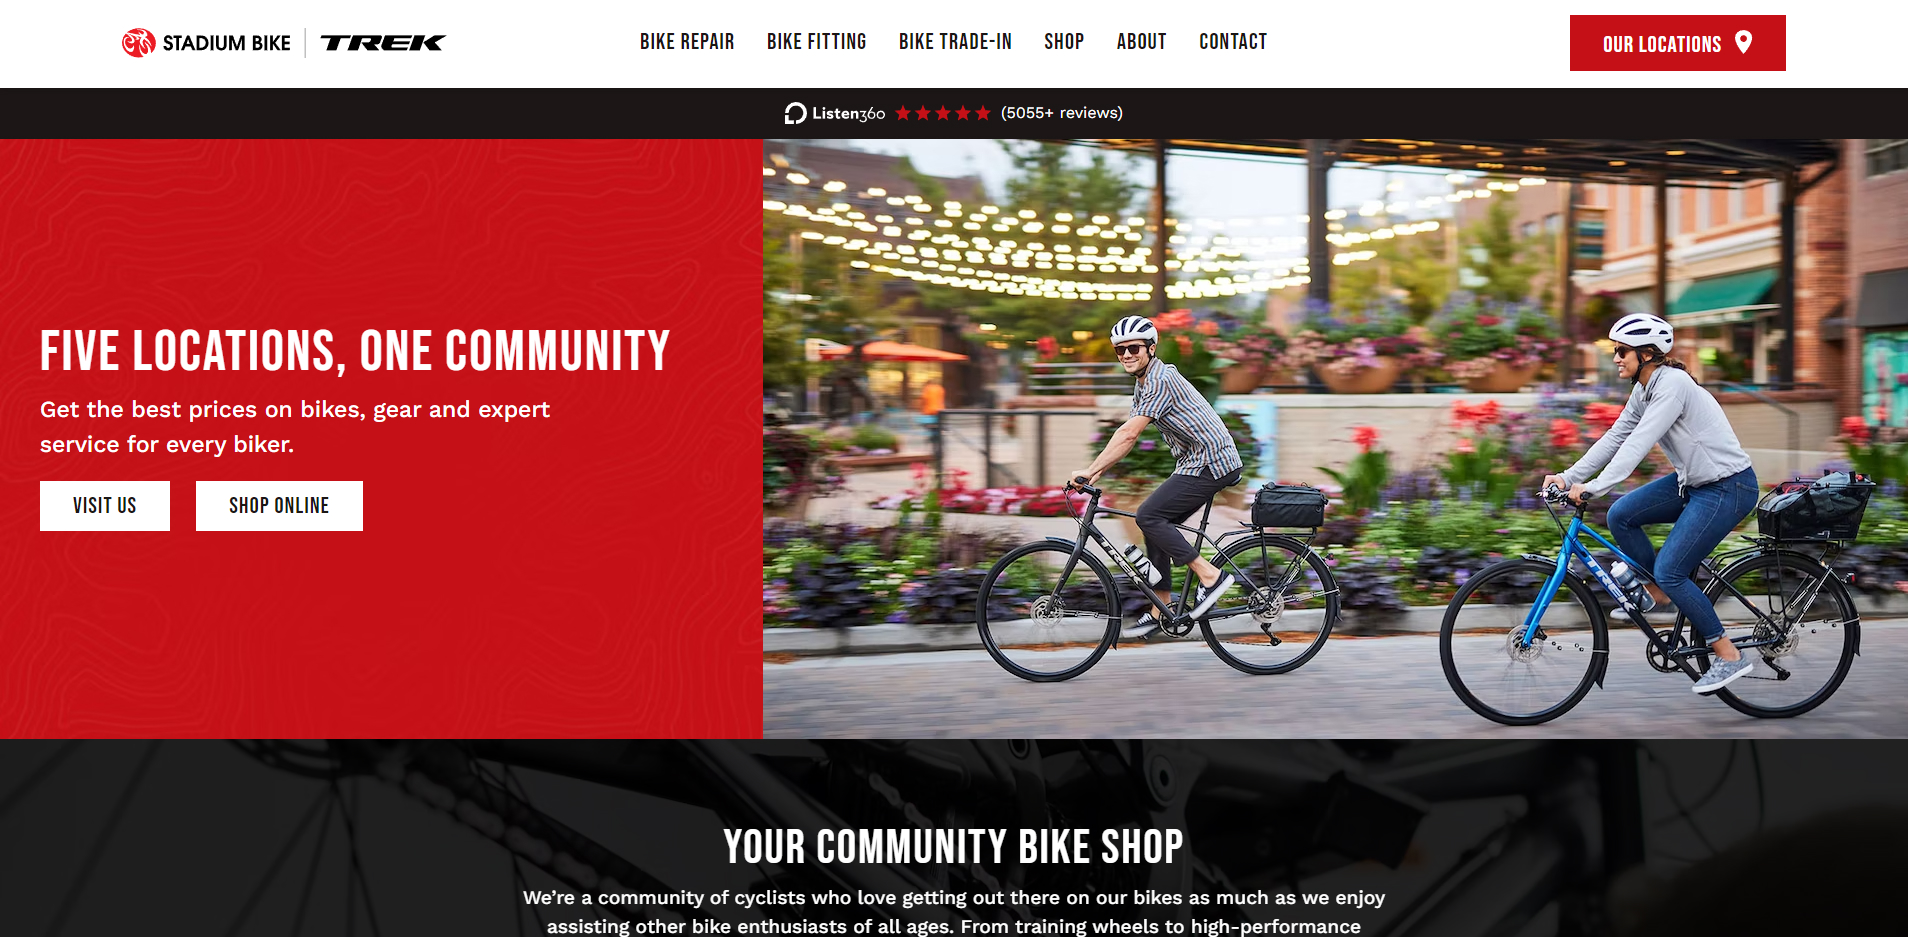
Images on the web can be tough and it's important to be thoughtful with your image selection. In order to be responsive, the vast majority of layout based images are background images. These allows them to be flexible and adjust to the various screen sizes that they will be viewed on. As a result, some outer areas of images will not be displayed.
You should aim to select images that have center focused subjects and allow plenty of white space between subjects and the edges of your images. The same applies for images that contain embedded text content. Choose images that have lots of white space between text and the edges. Images that have text edge to edge will not fully display your embedded text content.
Image Handling#
All images throughout the website are configured and served through an image transformation service called imgix.com. Imgix automatically handles all images that are uploaded to the website, resizes them and transforms them into modern image formats like AVIF and WEBP. This means better website performance and less work on your end.
Uploading Images#
Important!
You will never need to upload a full-resolution image to your website. Images are the most resource-intensive form of media that your website will load. Loading full-size images will negatively affect the performance of your website and will hurt your search rankings. If you're unsure how to handle images for the web, please reach out to Insight Creative, Inc. for assistance.
To optimize an image: make sure to only use .jpg image files. .png files save a lot more image data and can easily make an identical image four times the file size of a .jpg. If you are using an image editor like Photoshop, you will have image options when you save. Save as the lowest quality you can before your image starts to look bad (usually 80% quality). You should almost always shoot for under 300kb file size for all images you load to the website. When done right, it’s rare that the loss of image quality will be noticeable to an untrained eye.
After you save your image, the front end of the website will automatically optimize and transform your image into a more modern and performant image. This ensures your images are loading as fast as possible.
Bulk Saving of Edits#
You can now take advantage of CloudCannon's bulk saving of edits. Make multiple edits across pages, files, and collections and save them all simultaneously in a single batch. CloudCannon records your edits as you go, allowing you to save them all in one click. This means you only need to wait for your site to build once.
Build Times#
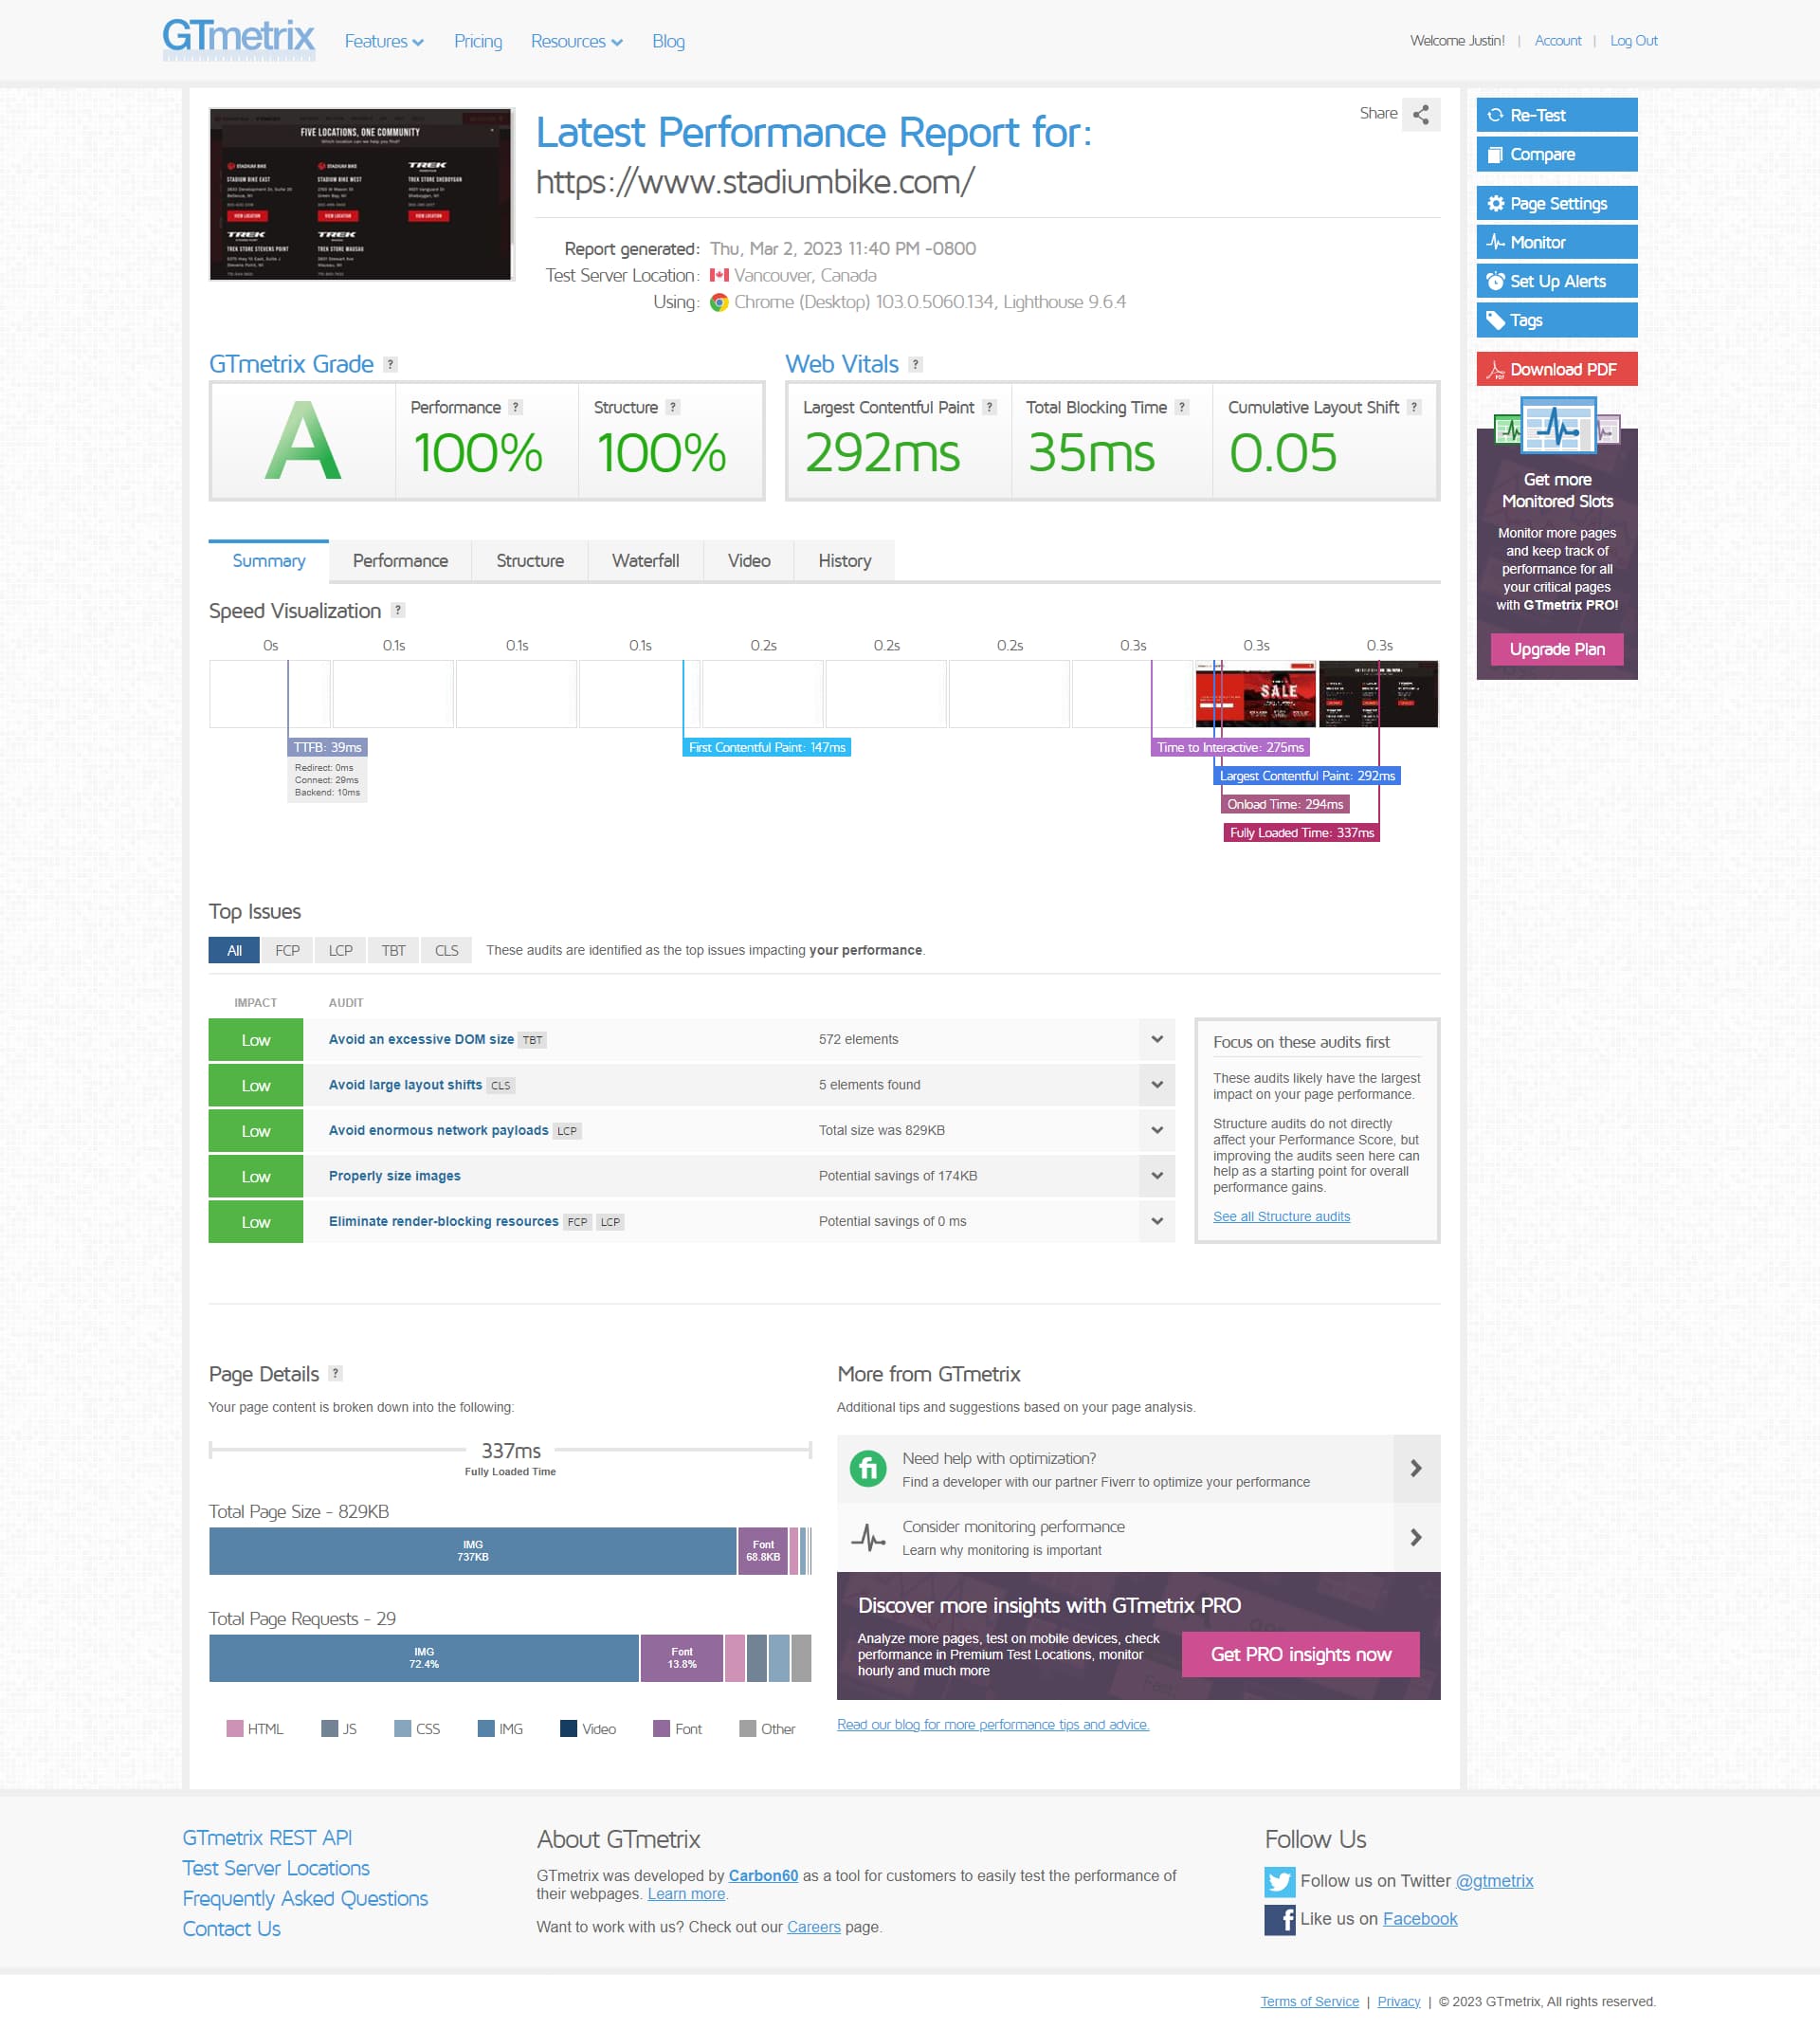
Your new Jamstack website does all the work upfront to prepare files for your website visitors so pages can be delivered much faster. At the time of the website launch, your site is loading at around 400ms*.
After editing a page's content, sit back, and enjoy some coffee. Give it a minute to rebuild your website and then go view your newly published change on the front end of your website. Builds typically take about 14 seconds.